
Knowledge Base
Fantaztix has an easy method to create invoices for unbilled reservations. You can also easily manage past-due invoices and receive invoice payments.
Reseller reservations come into the system from several sources:
All of these reservations should automatically be entered in the system at the agreed-upon pricing for that reseller.
It becomes necessary to bill the third party for their reservations, and this is done by generating an invoice for a specific time period. Depending on their arrangement with the reseller, the venue will typically invoice the third party weekly, bi-weekly or monthly.
To generate a new invoice, go to the Accounting menu and select "Create Invoice."
Select the reseller to invoice from the dropdown and enter the date range for the reservations to bill. Once you enter the dates, any unbilled reservations should automatically show up in the preview pane. If you make changes to the settings, it may be necessary to hit the blue "refresh" button.
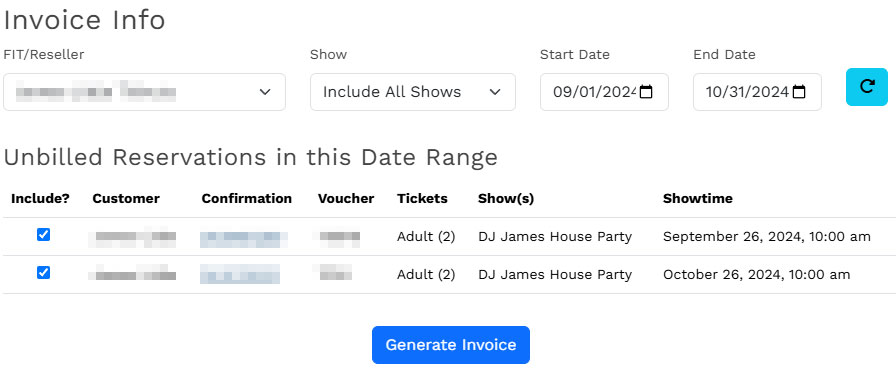
You can toggle any reservations that don't need to be billed yet.
When you're ready, click "Generate Invoice" to create the invoice. You will then be taken to the new invoice in draft mode.
Note: After a reservation is linked to an invoice, it no longer shows in the system as an "incomplete" payment and cannot be paid out or added to another invoice.
Once you see the new draft invoice, you should do one of the following:
Assuming the invoice is OK, click Save and Approve.
You will now be viewing the approved/active invoice. You can click "Email" to send the invoice to the reseller.
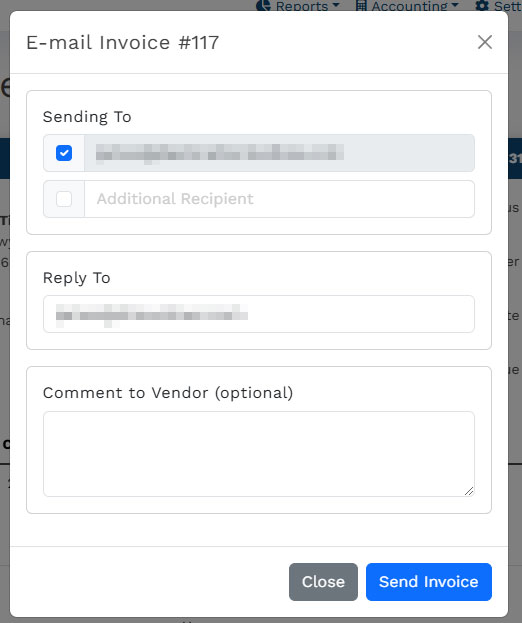
The "Sending To" box will be automatically populated with the emails listed on the reseller's account, as well as your reply-to address from the system settings. You can add an additional recipient by clicking the box and adding a new email address. You also can add a comment that will be added to the email sent to the reseller.
Note: The reseller will receive the invoice in the body of the email, as well as an attached PDF document.
After the invoice is sent, there will be notice at the top of screen with a record of the invoice being sent.
Alternative, you can click "Print" to send the invoice to your printer to be sent through traditional mail, or you can create a PDF version of the printout for your own records.